Every car has a story. The right angle is what tells it.
Whether you are a used car dealership managing hundreds of listings or a professional automotive photographer building a portfolio, the angle you choose determines whether a buyer stops scrolling or keeps going. Poor angles make great cars look forgettable. The right car photography angles make even modest inventory look showroom-ready.
This guide covers all 12 essential car angles for photography, how to execute each one correctly, and why post-processing is the step that separates average listings from listings that actually convert.
What are Car Photography Angles?
Car photography angles are specific camera positions used to highlight a vehicle’s design, power, and proportions. Key angles include the front 3/4 (showing front and side), rear 3/4 (capturing rear and side), low-angle (making the car look powerful), and detail shots covering wheels, headlights, and interior. The goal is to capture the car’s personality while managing reflections and emphasizing its body lines. For dealerships, the right set of car photo angles does one additional job, it gives online buyers enough visual confidence to make contact.
Top 12 Car Photography Angles Every Dealership and Photographer Should Know
Most dealership listings cover five or six angles at best. The ones that consistently outperform on VDP views, time-on-page, and inquiry rate cover all twelve. Each angle below has a specific job, skip one and you leave a buyer question unanswered.
1. Front 3/4 Shot (The Hero Shot)
The front 3/4 shot is the single most important angle in automotive photography and the standard opening image for every used car listing. Position yourself at roughly a 45-degree angle to the front corner of the vehicle, camera slightly below hood height. This perspective captures the grille, headlights, front fender, hood, and a generous portion of the side panel all in one frame.
It works because it communicates the car’s personality immediately. Aggressive or approachable, sporty or practical, the front 3/4 angle is where the vehicle’s design language speaks loudest. It is the go-to for VDP cover images, social media thumbnails, and print advertising.
Execution Tip: Turn the front wheels slightly toward the camera. It adds visual tension and a sense of forward motion that flat, wheels-straight versions simply do not have.
2. Rear 3/4 Shot
The rear 3/4 shot is the natural complement to the hero shot and should always be the second image in any listing sequence. Stand behind and to the side of the vehicle at a 45-degree angle, again slightly below the roofline. This angle captures the taillights, rear diffuser, exhaust outlets, and the full trailing side panel.
For sedans and coupes, it showcases aerodynamic design. For SUVs and trucks, it communicates ground clearance and rear presence. Buyers who like the front 3/4 will immediately look for this shot next, if it is missing, they notice.
Execution Tip: Confirm the rear wheel is clearly visible and angled toward the camera. A partially hidden wheel makes this shot feel unresolved.
3. Driver’s Side Profile
The full side profile from the driver’s side is the most structurally informative angle in car photography. Shoot at 90 degrees perpendicular to the vehicle, camera at door-handle or hubcap height. This angle reveals the complete silhouette, body length, roofline curve, door gaps, and wheel-to-body proportions, in a single clean frame.
For used car dealerships, this shot carries real commercial weight. Buyers use it to assess body panel condition, check for paint inconsistencies, and evaluate overall proportions before committing to an inquiry.
Execution Tip: Keep the wheels straight and shoot level. Any tilt distorts the proportions and pulls the eye away from the body lines.
4. Passenger’s Side Profile
Most photographers and dealerships stop at one side profile. That is a missed opportunity, particularly in used car dealership photography. The passenger’s side profile is a separate shot that deserves its own place in every listing.
Why it matters: damage, curb rash, panel repairs, and paint fade do not distribute evenly across a vehicle. A car with a pristine driver’s side can have significant wear on the passenger side. Showing both builds credibility. Buyers who notice you have included the passenger side profile read it as a signal that you are not hiding anything, and that trust converts.
Execution Tip: Match the camera height and distance exactly to the driver’s side profile for visual consistency across the listing.
5. Straight Front Shot
Stand directly in front of the vehicle and center the frame symmetrically on the grille and badge. This is not the most dynamic angle in car photography, but it plays a specific and important role in dealership listings: it shows buyers the face of the car with no perspective distortion and no hidden asymmetry.
For buyers comparing multiple similar vehicles, the straight front shot is where small differentiators, grille design, headlight shape, badge placement, become clearly visible.
Execution Tip: Use the interior rearview mirror aligned with the rear headrests as your centering guide. Symmetry is the entire point of this shot.
6. Straight Rear Shot
The mirror of the straight front, taken from directly behind the vehicle at the same height and centering discipline. This angle is particularly valuable for luxury vehicles and EVs, where taillight signatures and rear badge placement are key design differentiators that buyers actively compare.
It also communicates the vehicle’s true width honestly, something angled shots can distort, which matters to buyers who are size-conscious or comparing multiple models.
7. Low Angle / Worm’s Eye Shot
Drop the camera close to the ground and shoot upward toward the vehicle’s front or front 3/4. This angle dramatically exaggerates height, stance, and road presence, making any car feel more powerful and commanding in the frame.
For trucks, SUVs, and performance cars, this is one of the best camera angles for car photography when conveying character beyond what standard overview shots communicate. It is used heavily in paid advertising creative, hero banner imagery, and social media content where stopping a scroll is the goal rather than providing buyer information.
Execution Tip: Shoot from just ahead of the front wheel to capture the undercarriage edge, front bumper, and hood rising away from the camera. Even a modest vehicle looks formidable from this position.
8. Overhead / Bird’s Eye Shot
Position the camera directly above the vehicle, from an elevated position, a drone, or a raised platform, shooting straight down. This angle is relatively uncommon in standard dealership photography but genuinely differentiates listings for SUVs, trucks, and crossovers where roof rails, sunroofs, and overall footprint are relevant purchase considerations.
It also gives the listing a visually distinct moment that breaks the standard angle sequence and tends to perform well as a secondary social media image. Very few competitors include this angle, which makes it a real differentiator for any dealership willing to add it to their walk-around.
9. Wheel Close-Up
Position the camera at wheel height, just outside the wheel arch, and fill the frame with the rim design, tire profile, and brake caliper. This is the detail angle that serious buyers examine most closely on used car listings.
Curb rash, uneven tire wear, aftermarket rims, and brake condition all communicate the vehicle’s history and care level in a way no overview shot can. Showing wheel close-ups proactively, ideally all four corners, removes uncertainty and reduces pre-purchase inquiry volume because buyers already have the answers they were going to ask for.
10. Engine Bay Shot
Open the hood and shoot from a slight elevated angle, showing the full engine bay layout clearly. For used car buyers, this is a credibility shot more than an aesthetic one. A clean, well-organized engine bay tells buyers the vehicle has been maintained. A dirty or cluttered bay raises questions they will voice before making an offer.
Execution Tip: Do a quick wipe-down of the engine bay before shooting. The difference in buyer perception between a clean and dusty engine is significant and worth the ten minutes it takes.
11. Front Interior / Dashboard Shot
Shoot from the open driver’s door, camera at seat level angled toward the dashboard, steering wheel, and infotainment screen. This is one of the most scrutinized shots in any used car listing because it is where buyers assess daily livability, the quality of materials, the condition of controls, and the technology on offer.
Key Elements to Include in the Frame: instrument cluster, infotainment screen ideally powered on, steering wheel, gear selector, and center console. Seat material and headliner condition should both be visible.
12. Rear Seat and Trunk / Boot Space Shot
Two shots that complete the interior coverage: one from the open rear door showing rear seating space and headroom, and one from directly above or behind the open trunk showing cargo capacity.
For family vehicles, SUVs, and hatchbacks, these shots often influence the final purchase decision more than any exterior angle. Buyers with specific space requirements, car seats, weekly grocery runs, sporting equipment, are making a practical decision. Giving them that visual information from the listing reduces friction and improves inquiry quality.
Execution Tip: For vehicles where flat-folding rear seats are a selling feature, show it. Capture the full depth and width of the boot with good lighting, a small LED panel works well if natural light is limited.
You can also check out the best car photography tips to elevate your shots and capture stunning automotive visuals.
Why Do You Need BgWipe After Capturing the Right Angles?
Capturing all 12 car photography angles is only half the job. Raw lot photos, regardless of how carefully they are framed, are almost never listing-ready straight out of the camera.
A cluttered lot background undermines a perfectly executed front 3/4 hero shot. Reflections on a freshly waxed hood make a clean car look unpolished. Inconsistent lighting across exterior and interior shots makes a listing feel disjointed. An exposed license plate is a compliance issue on most major platforms. These are not edge cases, they are the standard reality of dealership lot photography. So, you need BgWipe PhotoRoom for your car retouching.
BgWipe solves all of this automatically.
It is an AI-powered car image processing platform built specifically for used car dealerships. Upload your raw lot photos and BgWipe delivers studio-quality results in seconds, no studio, no manual editing, no photographer overhead required.
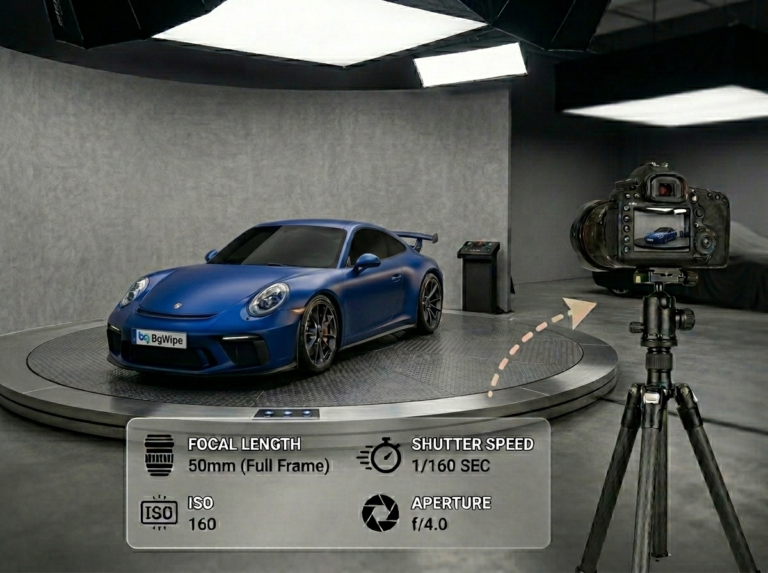
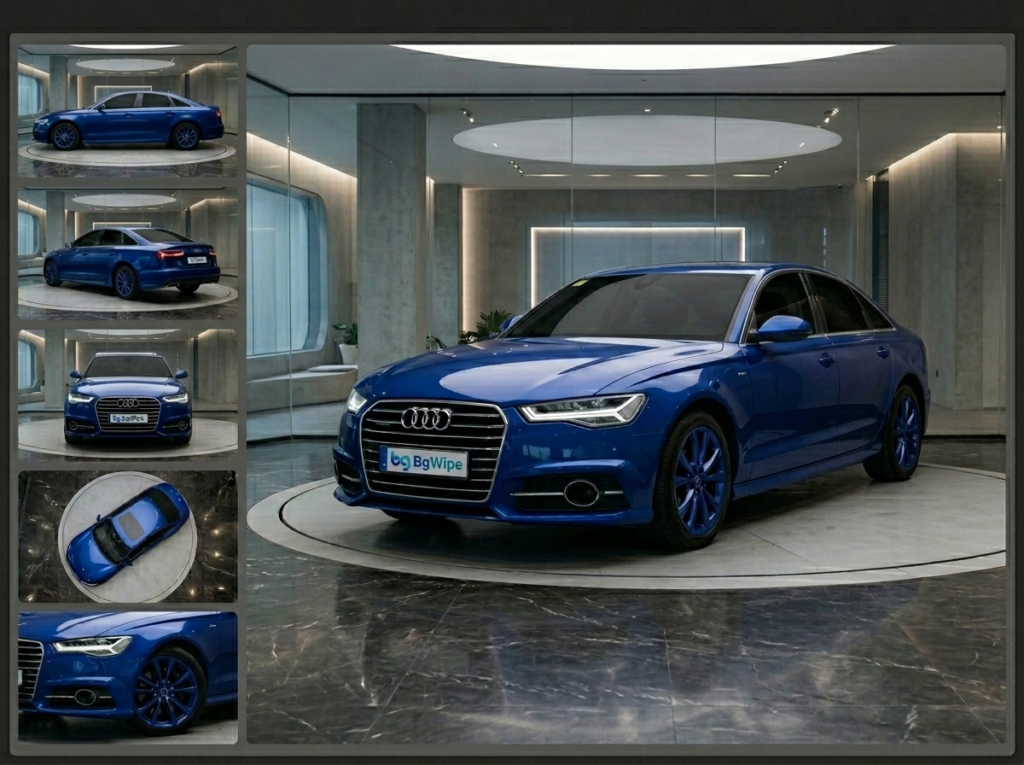
1. AI Background Replacement
We remove cluttered lot environments and replace them with clean, professional studio settings. Your front 3/4 hero shot looks consistent and polished regardless of where or when it was taken.
2. Reflection Removal
With BgWipe you can eliminate distracting glare from paint, glass, and body panels, revealing the true finish of the vehicle exactly as a buyer would see it in person.
3. Auto Shadow Generation
You can add natural, accurate ground shadows that anchor the vehicle in the frame and make every image look genuinely photographed rather than digitally composited.
4. Instant Number Plate Masking
BgWipe automatically detects and blur license plates across your inventory, no manual selection, no missed plates, no compliance exposure.
5. Window Tinting
We help you apply a clean, consistent tint to vehicle windows with a single click, elevating the perceived value of the listing without any physical modification to the vehicle.
BgWipe Photoroom integrates directly with the platforms used car dealerships already operate on, so it fits into your existing inventory workflow rather than creating a new one to manage.
The result is simple: every angle you shoot, every listing you publish, looks like from a virtual car showroom, as if it came out of a professional studio.
Conclusion
Mastering car photography angles is not about artistic ambition. For dealerships and automotive photographers working in the retail space, it is a commercial discipline with a direct line to lead volume, buyer trust, and days-to-sale.
The front 3/4 hero shot stops the scroll. The side profiles create transparency. The passenger’s side catches what the driver’s side hides. The detail shots, wheels, engine bay, interior, trunk, answer the questions buyers are already asking before they reach for their phone.
Twelve angles, executed consistently across every vehicle, is the standard that top-performing dealerships hold themselves to. It is also the standard that platforms like Cars.com, AutoTrader, and CarGurus increasingly reward with better visibility.
Try BgWipe PhotoRoom today, and close the gap between the photos you take on the lot and the studio-quality images your listings need to compete. Every angle, every vehicle, every time.